
Get Started
Content
Get Started#
It is good practice to create virtual environment for your each of your programming projects. Below are instructions
for creating the sarkas virtual environment. Otherwise you can jump to the next section and install Sarkas
Warning
If you are unfamiliar with command line interface we strongly suggest to follow the instructions to create a virtual environment via Anaconda Navigator.
Step 1. Virtual Environment#
Command Line Interface (UNIX systems)#
Open a Terminal and check if you have conda installed
$ which conda
This command will print the path of your conda binaries. If nothing is printed then you need to install it.
Visit Anaconda and download their Python 3.* installer.
You can create a virtual environment via
$ conda create --name sarkas python=3.7 pip
This command will create the virtual environment sarkas with python 3.7 and pip installed.
The environment can be found in the envs directory of your conda directory (the one printed above by the command which).
Once the environment has been created you can activate it by
$ conda activate sarkas
and deactivate it by
$ conda deactivate
Step 2. Installation#
Anaconda Navigator#
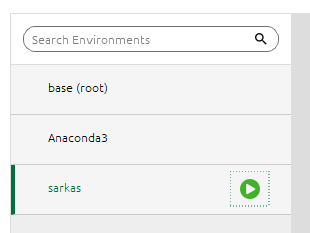
Once you created the environment you can activate it by clicking on it. Note that an arrow next to the name indicates that the environment is active. See figure below
Click on the arrow and select Open in Terminal. In Terminal you can install sarkas system wide via
$ pip install sarkas
Command Line Interface (UNIX systems)#
Activate the sarkas environment, if not already active, via you can install sarkas system wide via
$ conda activate sarkas
You can now install sarkas system wide via .. code-block:: bash
$ pip install sarkas
Note
Unfortunately at the moment Sarkas is available only via PIP. We are working on distributing it via conda.
External packages#
Sarkas uses two external packages: FFTW and FMM3D . The first is used to perform fast Fourier transforms and the second to simulate systems with open boundary conditions.
FFTW3 is a very common library in scientific computation, however, it may happen that you don’t have it already installed on your computer. In this case, follow their instructions to install it.
FMM3D is package written in Fortran to compute the potential field using the Multipole expansion. The documentation for installing it is here. You can find their section on a Python wrapper.
Known Issues#
Pyfftw Runtime error#
The following error message could appear while running Sarkas for the first time
RuntimeError                              Traceback (most recent call last)
RuntimeError: Undefined plan with nthreads. This is a bug
Exception ignored in: 'pyfftw.pyfftw._fftw_plan_with_nthreads_null'
RuntimeError: Undefined plan with nthreads. This is a bug
---------------------------------------------------------------------------
Note that this won’t stop the simulation and Sarkas will still be running.
The error message is due to a package conflict. It happens if the version of your pyfftw package is newer than 0.12.0.
A quick hack is to revert your pyfftw version to 0.12.0 via
$ pip install pyfftw==0.12.0
Matplotlib style not found#
Sarkas contains two matplotlib configuration files,
MSUstyle
and PUBstyle.
However, they are not installed by default. Therefore, if you want to use our styles, you need to manually copy
the mpl styles in the correct folder. Here is a sample python script for installing the mpl styles.
Remember to point to the right STYLE_PATH.
import matplotlib as mpl
import shutil
import os
import glob
# ~ # ref  ->  matplotlib/style/core
BASE_LIBRARY_PATH = os.path.join(mpl.get_data_path(), "stylelib")
STYLE_PATH = "Path of MSUstyle and PUBstyle"
STYLE_EXTENSION = "mplstyle"
style_files = glob.glob(os.path.join(STYLE_PATH, "*.%s" % (STYLE_EXTENSION)))

# Copy the plotting style in the matplotlib directory
for _path_file in style_files:
    _, fname = os.path.split(_path_file)
    dest = os.path.join(BASE_LIBRARY_PATH, fname)
    shutil.copy(_path_file, dest)
    print("%s style installed" % (fname))
Run the code#
In the following pages you will find a quickstart notebook to check that Sarkas runs correctly and a long tutorial on how to setup and run simulations.